Android Testing with Espresso — Part 2
This post was translated from Portuguese using generative AI.
Simple assertions and interactions with views.
In part 1 we saw how to configure our project. If you want to start from this part, clone the EspressoTests project on GitHub and fork the ‘part_1’ branch, which represents the project state at the end of part 1.
Creating the first test
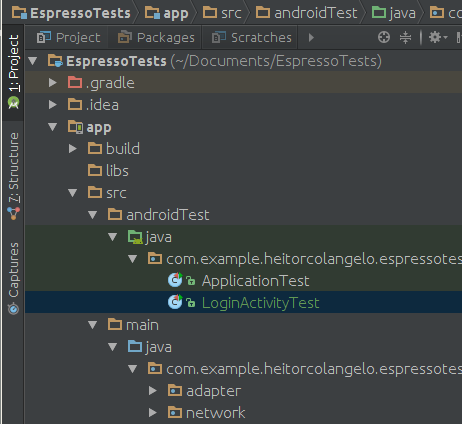
Let’s start by testing the login screen. To do this, create a LoginActivityTest class in the /app/src/androidTest/ directory of the project, as shown in the image below:
Annotate the class we created with the @RunWith(AndroidJUnit4.class) annotation.
This will indicate that this class should be executed with AndroidJUnitRunner; to learn more about it, access the link.
Now, let’s define our ActivityTestRule with the activity that will be started before all our tests, that is, the activity we want to test.
@Rule
public ActivityTestRule<LoginActivity> mActivityRule = new ActivityTestRule<>(
    LoginActivity.class,
    false,
    true
);
The constructor parameters are:
- The activity to be tested (LoginActivity.class),
- initialTouchMode (false),,
- Whether to start automatically or not (true).
Your code should look like this:
@RunWith(AndroidJUnit4.class)
public class LoginActivityTest {

  @Rule
  public ActivityTestRule<LoginActivity> mActivityRule = new ActivityTestRule<>(
        LoginActivity.class,
        false,
        true
  );

}
Writing the first test
Now let’s write our first test. We should test the different states that the screen in question can assume. For example, as soon as we start LoginActivity, it displays an image, two text fields, and a button. This can be considered the initial state of the screen. Let’s write a test to verify this state.
@Test
public void whenActivityIsLaunched_shouldDisplayInitialState() {
  onView(withId(R.id.login_image)).check(matches(isDisplayed()));
  onView(withId(R.id.login_username)).check(matches(isDisplayed()));
  onView(withId(R.id.login_password)).check(matches(isDisplayed()));
  onView(withId(R.id.login_button)).check(matches(isDisplayed()));
}
One of the advantages of Espresso is that the syntax is very intuitive. We can practically read in natural language what the test is executing. Let’s analyze the first line of the test:
onView(withId(R.id.login_image)).check(matches(isDisplayed()));
We could read this line in natural language, for example: “Check that the view with id login_image is visible on the screen”. Now, explaining a bit what’s happening:
onView()will receive theViewMatcherswe pass as a parameter and will return to us aViewInteractionobject. In other words, we are passing to it the view we want to interact with;withId()will receive the id of the view and will return aViewMatchers;check()will receive aViewAssertion. That is, it will check if the assertion we are passing as a parameter is valid;matches()will receive aViewMatchersand return aViewAssertion;isDisplayed()is theViewMatcherswe will use.
To learn more about the objects, click on the links about ViewMatchers, ViewInteraction, and ViewAssertion.
Running the test
Now just run the test, right? Wrong! We need to disable animations in the developer options of our emulator/device. To do this, go to Settings > Developer options and turn off these three options:
- Window animation scale;
- Transition animation scale;
- Animator duration scale.
Espresso waits for the UI Thread to become idle to execute the next test step. However, if the animations are on, it will get lost and the tests will break, read more about it here.
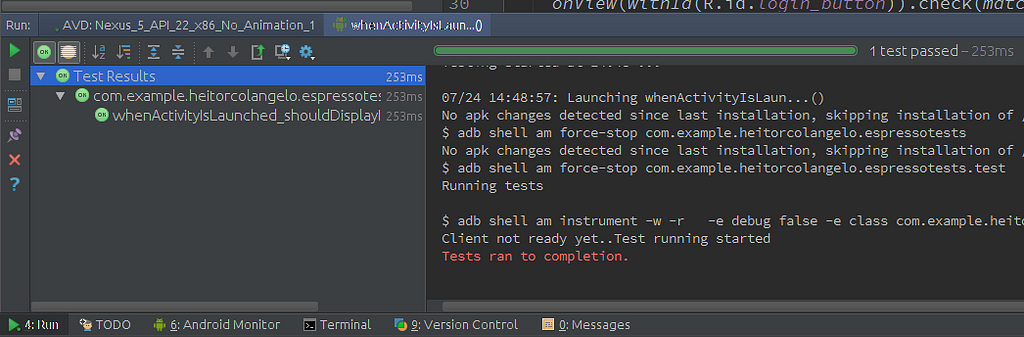
Now, to run this test, just click the right mouse button on the method and then click on the option Run ‘whenActivityIsLaunched…‘. If everything goes well, you should see the test being executed on your emulator and the test console will be like this:
Alright, but how do I ensure that Espresso is really working and looking at whether my views are appearing on the screen? To ensure this, let’s change the first line of this test that we did:
onView(withId(R.id.login_image)).check(matches( not(isDisplayed()) ));
The not() method will invert the result we expected. So, in this test, I am saying that the view with id login_image will not be visible on the screen, which is not true, because when starting the screen, the image will be visible. So the test must fail. If we run the test again:
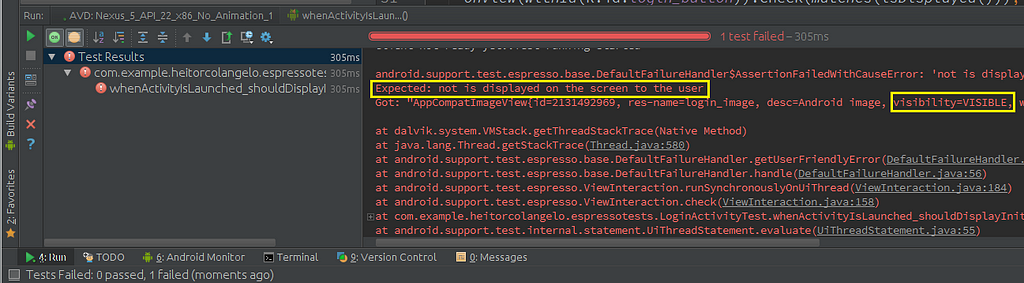
Great, our test failed, which means that Espresso is making the assertions correctly. Better than that, notice the log it shows:
Expected: not is displayed on the screen to the user
Got: AppCompatImageView{..., visibility=VISIBLE, ...}
That is, it also shows us where the test is failing. Now we can remove the not() method we added and run this test again. Is it green? Then let’s move on.
This test was easy, what we should do now is test the other states of the screen. One of these other states is when we leave one of the text fields blank and click on the login button. When this happens, the app displays a dialog on the screen. Let’s write a test to verify this state.
@Test
public void whenAnyEditTextIsEmpty_andClickOnLoginButton_shouldDisplayDialog() {
  onView(withId(R.id.login_username)).perform(typeText("admin"));
  onView(withId(R.id.login_button)).perform(click());
  onView(withText(R.string.validation_message)).check(matches(isDisplayed()));
  onView(withText(R.string.ok)).perform(click());

  onView(withId(R.id.login_username)).perform(clearText());
  onView(withId(R.id.login_password)).perform(typeText("pass123"));
  onView(withId(R.id.login_button)).perform(click());
  onView(withText(R.string.validation_message)).check(matches(isDisplayed()));
  onView(withText(R.string.ok)).perform(click());
}
Do not execute the test yet, it won’t work, but for another reason I’ll address later. First, let’s just analyze the code. We use three new methods:
perform(): will execute the ViewAction it receives as a parameter;typeText(): ViewAction to type text into the view;click(): ViewAction to click on the view;withText(): will search for the view containing the text passed as a parameter.
The first block of our test is performing the following actions:
- Typing text in the login_username field;
- Clicking on the login button;
- Verifying that the dialog is appearing (because we left the password field blank);
- Clicking Ok in the dialog to close it.
The second block does basically the same thing as the first block, only with the login_password field. The only difference is that it clears the login_username field before, because the field is filled because of the previous block. This is not very good, having to clear what the previous steps of the test did to execute the next steps. Our tests should validate scenarios in an isolated manner. So let’s refactor this code.
@Test
public void whenPasswordIsEmpty_andClickOnLoginButton_shouldDisplayDialog() {
  onView(withId(R.id.login_username)).perform(typeText("admin"));
  onView(withId(R.id.login_button)).perform(click());
  onView(withText(R.string.validation_message)).check(matches(isDisplayed()));
  onView(withText(R.string.ok)).perform(click());
}

@Test
public void whenUserNameIsEmpty_andClickOnLoginButton_shouldDisplayDialog() {
  onView(withId(R.id.login_password)).perform(typeText("pass123"));
  onView(withId(R.id.login_button)).perform(click());
  onView(withText(R.string.validation_message)).check(matches(isDisplayed()));
  onView(withText(R.string.ok)).perform(click());
}
Great, now we have two tests, and one is not influencing the other. However, we still repeat the same steps for both tests. I think we can refactor them again.
@Test
public void whenPasswordIsEmpty_andClickOnLoginButton_shouldDisplayDialog() {
  testEmptyFieldState(R.id.login_username);
}

@Test
public void whenUserNameIsEmpty_andClickOnLoginButton_shouldDisplayDialog() {
  testEmptyFieldState(R.id.login_password);
}

private void testEmptyFieldState(int notEmptyFieldId){
  onView(withId(notEmptyFieldId)).perform(typeText("defaultText"));
  onView(withId(R.id.login_button)).perform(click());
  onView(withText(R.string.validation_message)).check(matches(isDisplayed()));
  onView(withText(R.string.ok)).perform(click());
}
Now it’s better, we have cleaner and more reusable code. This is a good time for me to give you the first tip of this series:
Write small tests, don’t write long tests.
Avoid writing tests that do several things, focus on small, preferably independent scenarios.
Now, try to run the tests. As I mentioned before, they fail. Let’s analyze the log:
Error performing 'single click - At Coordinates: ... **on view 'with id: com.example.heitorcolangelo.espressotests:id/login\_button'.**
Apparently Espresso couldn’t click on the login button, that is, the problem is in the second line of the testEmptyFieldState method:
onView(withId(R.id.login_button)).perform(click());
Put a breakpoint on this line and let’s see the emulator screen at this moment:
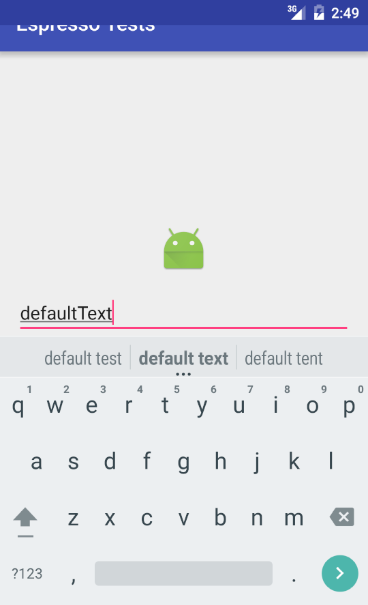
Notice that the virtual keyboard is taking up a good part of the screen, it is even covering our login button, so Espresso cannot click on the button. To fix this problem, let’s use the closeSoftKeyboard() method.
onView(withId(notEmptyFieldId)).perform(typeText(“defaultText”), closeSoftKeyboard());
This method will close the virtual keyboard after we type the text “defaultText”. Our login button will be visible and Espresso will be able to click on it. Run the test again, I believe it will pass now.
Here’s the second tip:
Whenever you have a test that involves typing text in an EditText, don’t forget to use the
closeSoftKeyboard()method to hide the virtual keyboard.
If you leave the virtual keyboard open during tests, it will cover views that may be essential for your test, and it will fail.
Phew, quite a bit so far, but we still have two scenarios to validate:
- When both fields are empty, it should display the dialog;
- When both fields are filled, it should open MainActivity.
I’ll leave scenario 1 as an exercise for you to solve. Scenario 2 involves another concept that I’ll leave for the next post.
At the end of this step, your code should look like the part_2 branch.
If you have any questions, suggestions, or found any incorrect information in this post, leave a comment below.